
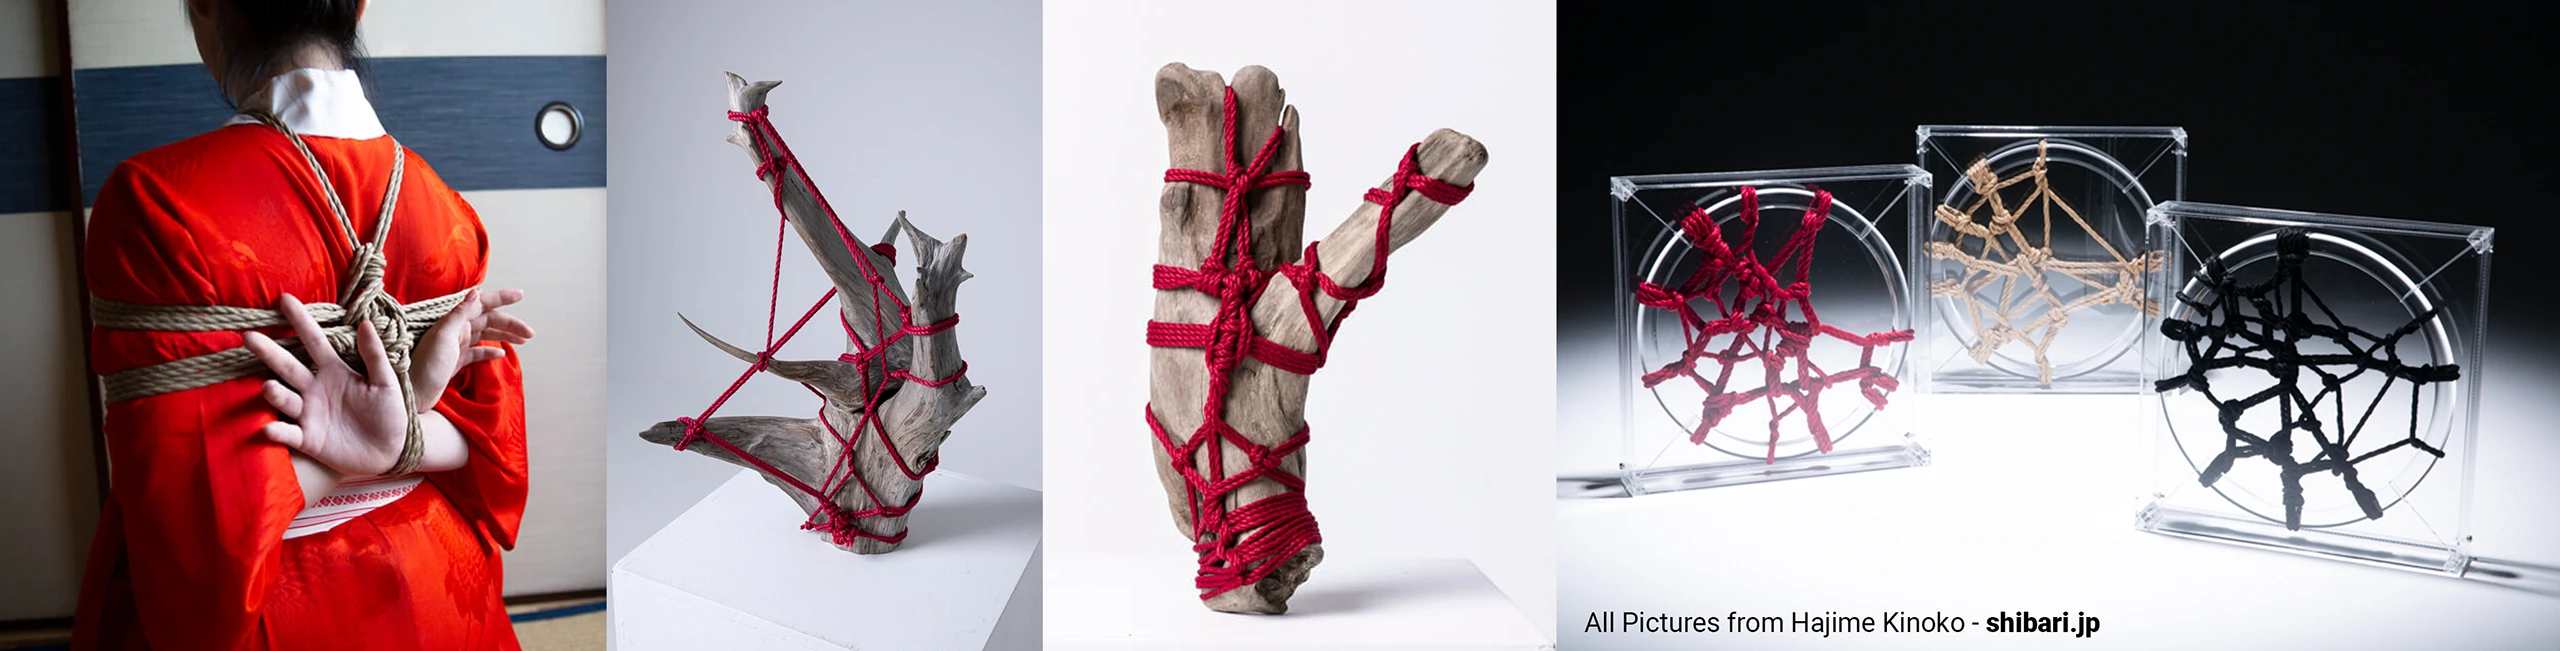
Shibari – Japanese Rope Art
Shibari is the art of japanese rope bondage. This can encompass eroticism, but it can also be purely platonic, or asthetic. I’ve been fascinated by the ways shibari can be used to build a connection, but also its fascinating visuals for a long time, and I’m learning the practise myself. Below you can see a few examples by the artist Hajime Kinoko, whos work you can check out at shibari.jp.
My first Shibari Set
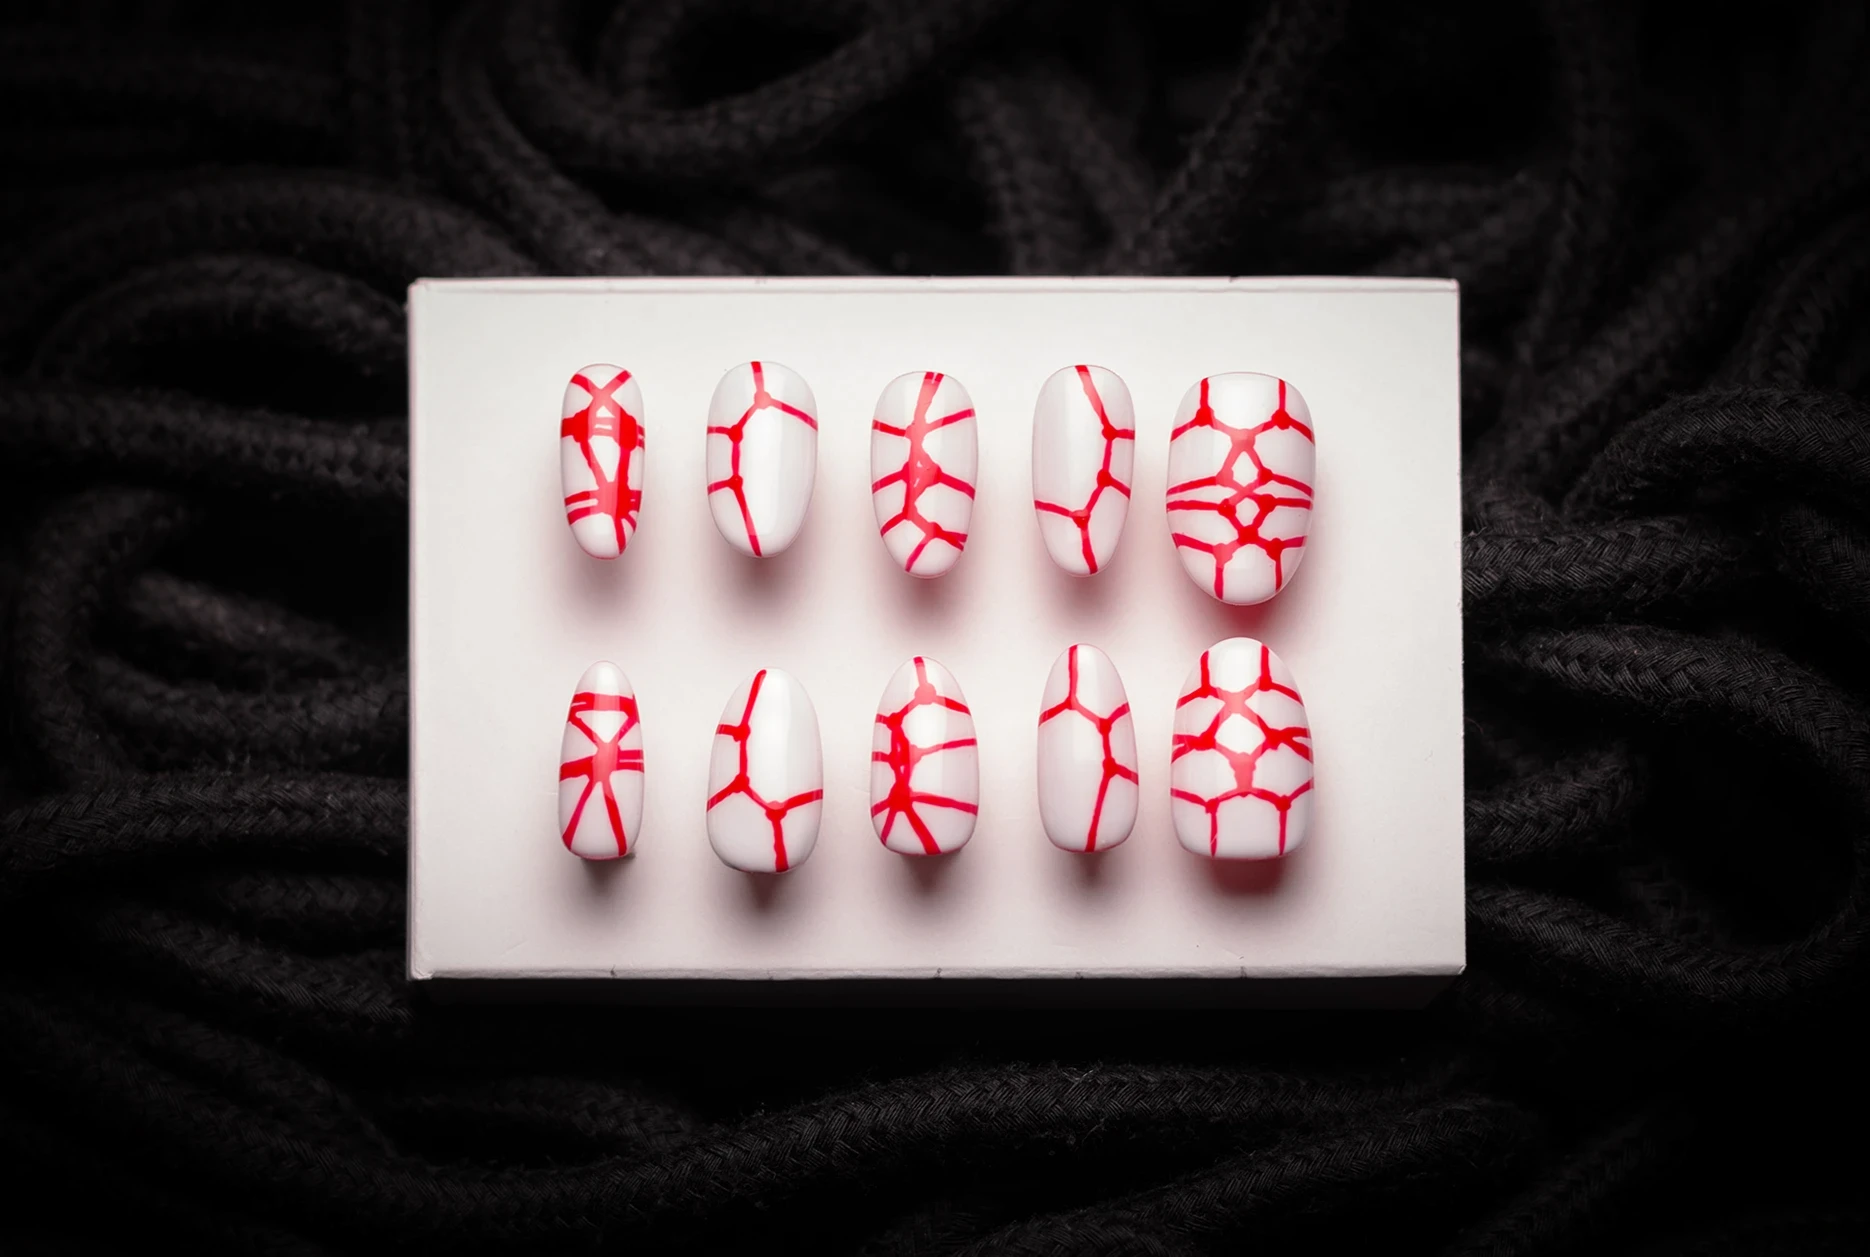
So far I made two Shibari Sets. The first one was purely leaning on the asthetic. I conceptualised the design on paper (which I sadly couldn’t find a picture of). My goal was to capture the asthetic of rope being tied with the tension distributing along the rope and giving a realistic look, with little dots for knots / frictions and lines connecting as rope. I still mostly like the design, although I would now utilize a different nail shape, finer lines, and tie design more oriented around actual / common ties. Another element I still really like is that the underside of the nail is fully red.
My Second Shibari Set
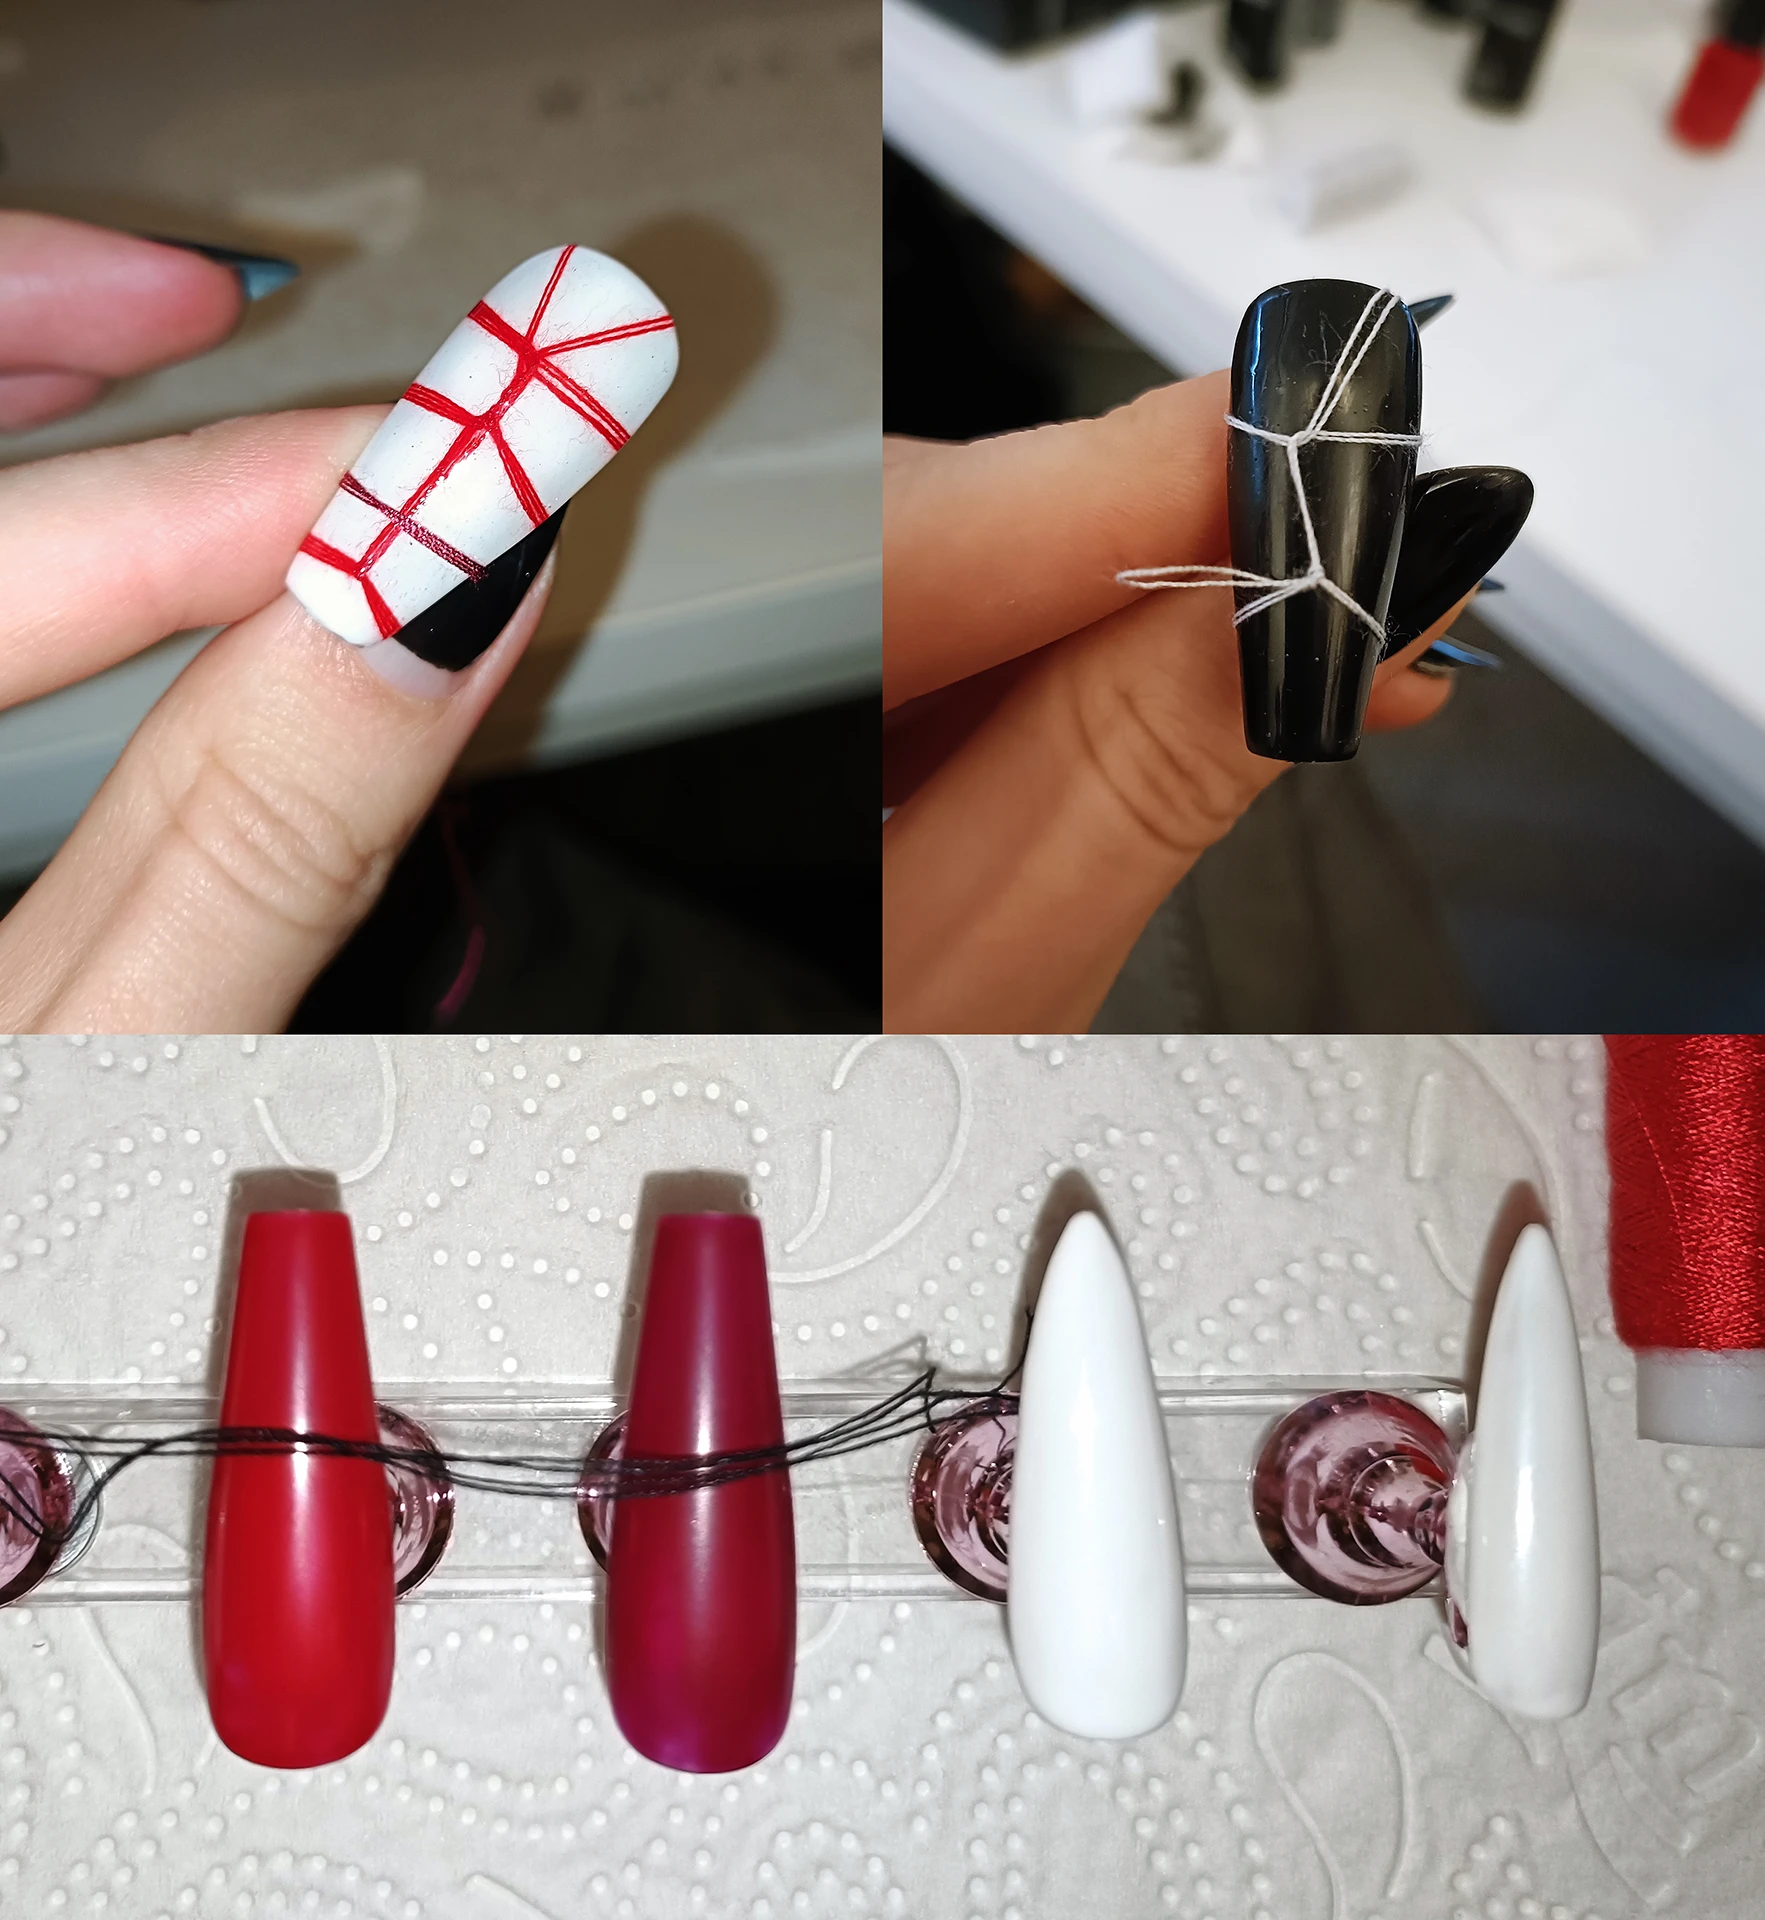
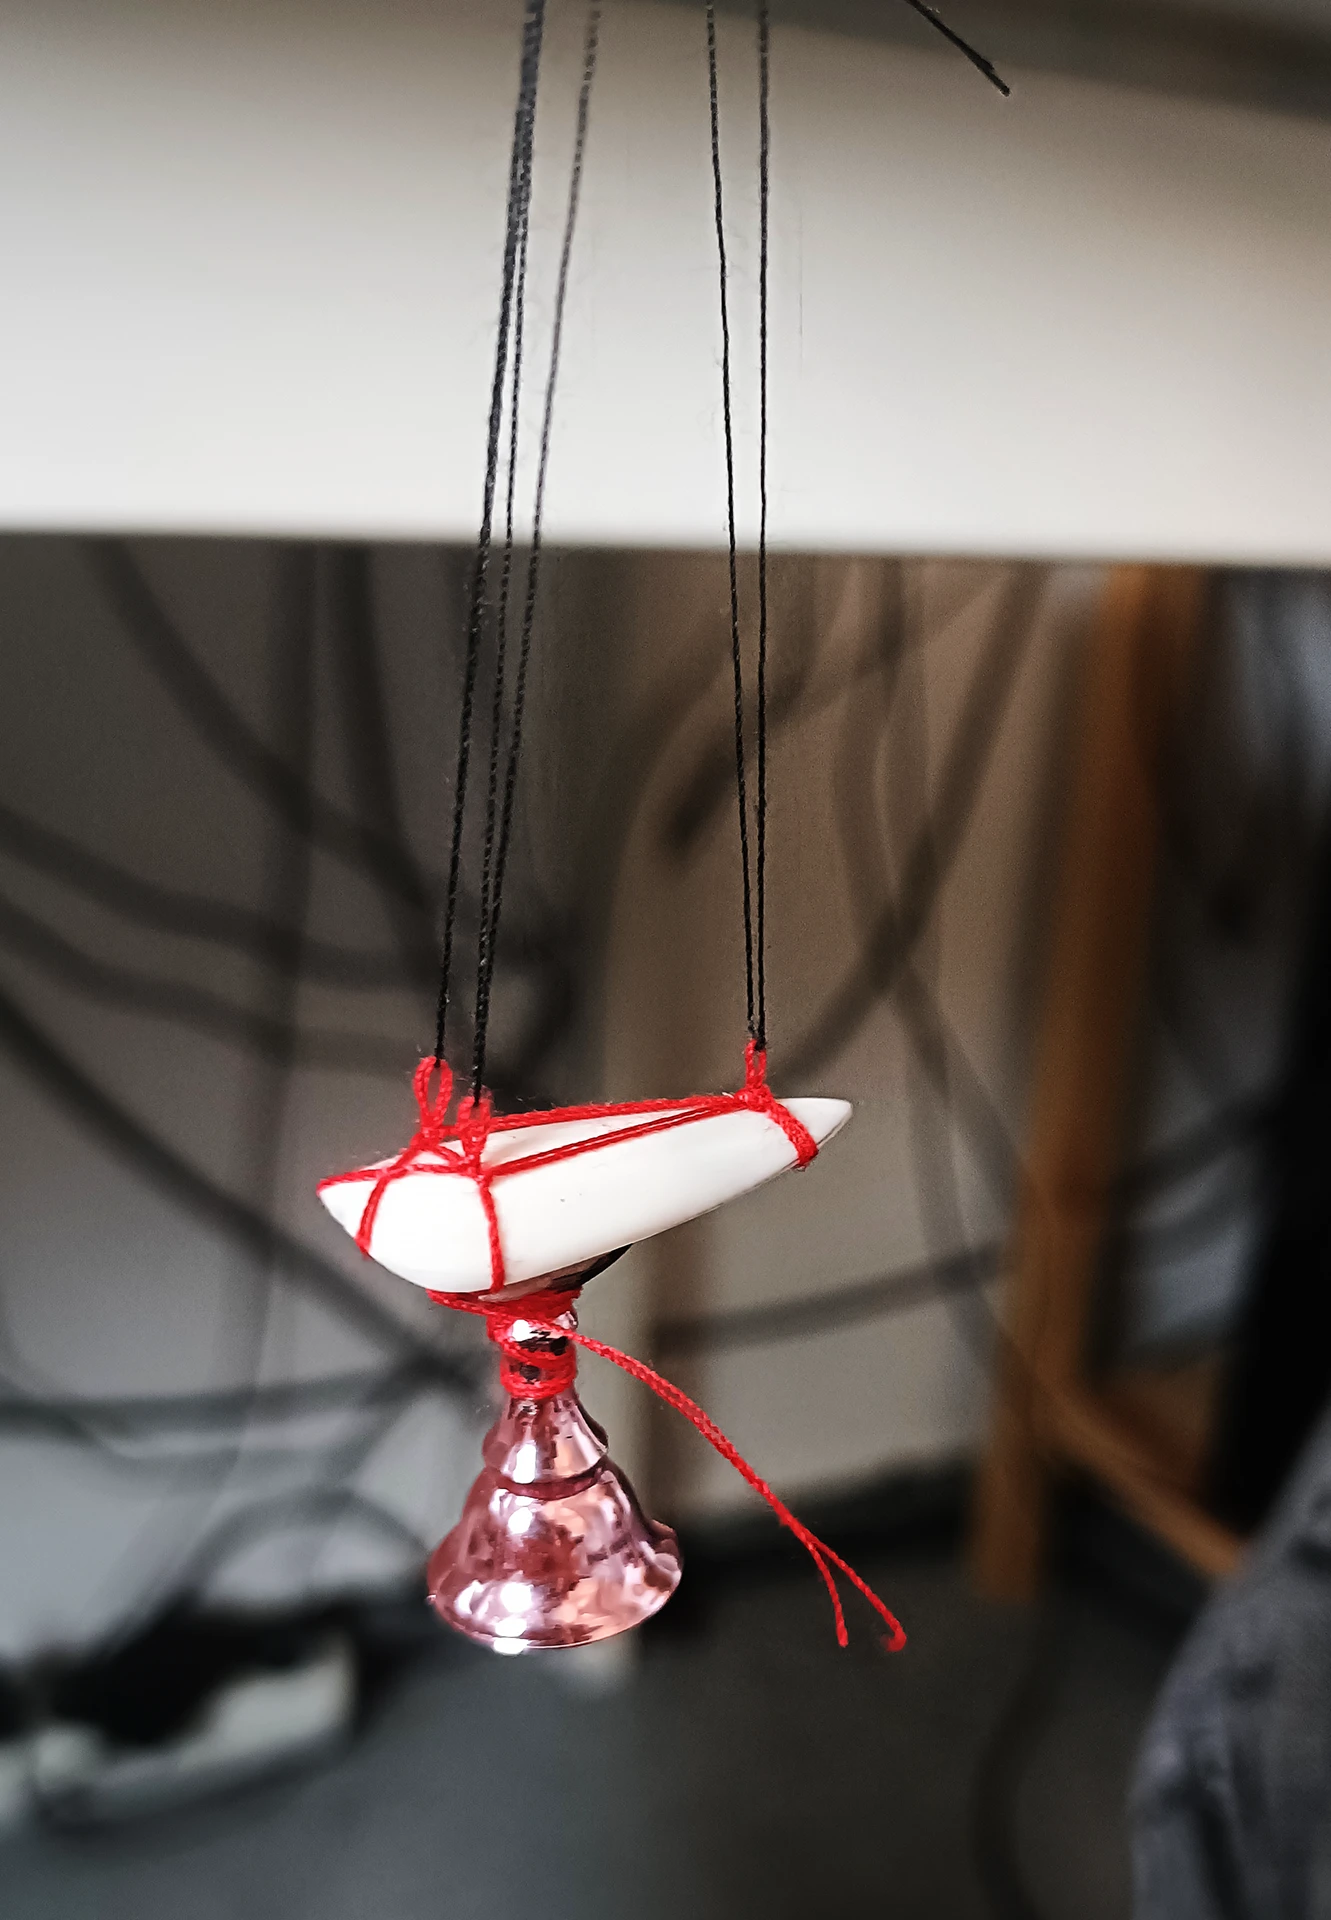
Since I did my first set I started learning the practice of Shibari and therefore I wanted to approach a nailset in a new way, not by painting, but by actually incorporating shibari into the nails. I used sewing thread and utilized actual shibari tying techniques to create these patterns, which I then encased in clear top coat, filed down to get them smooth and then topped up with a final layer of top coat.
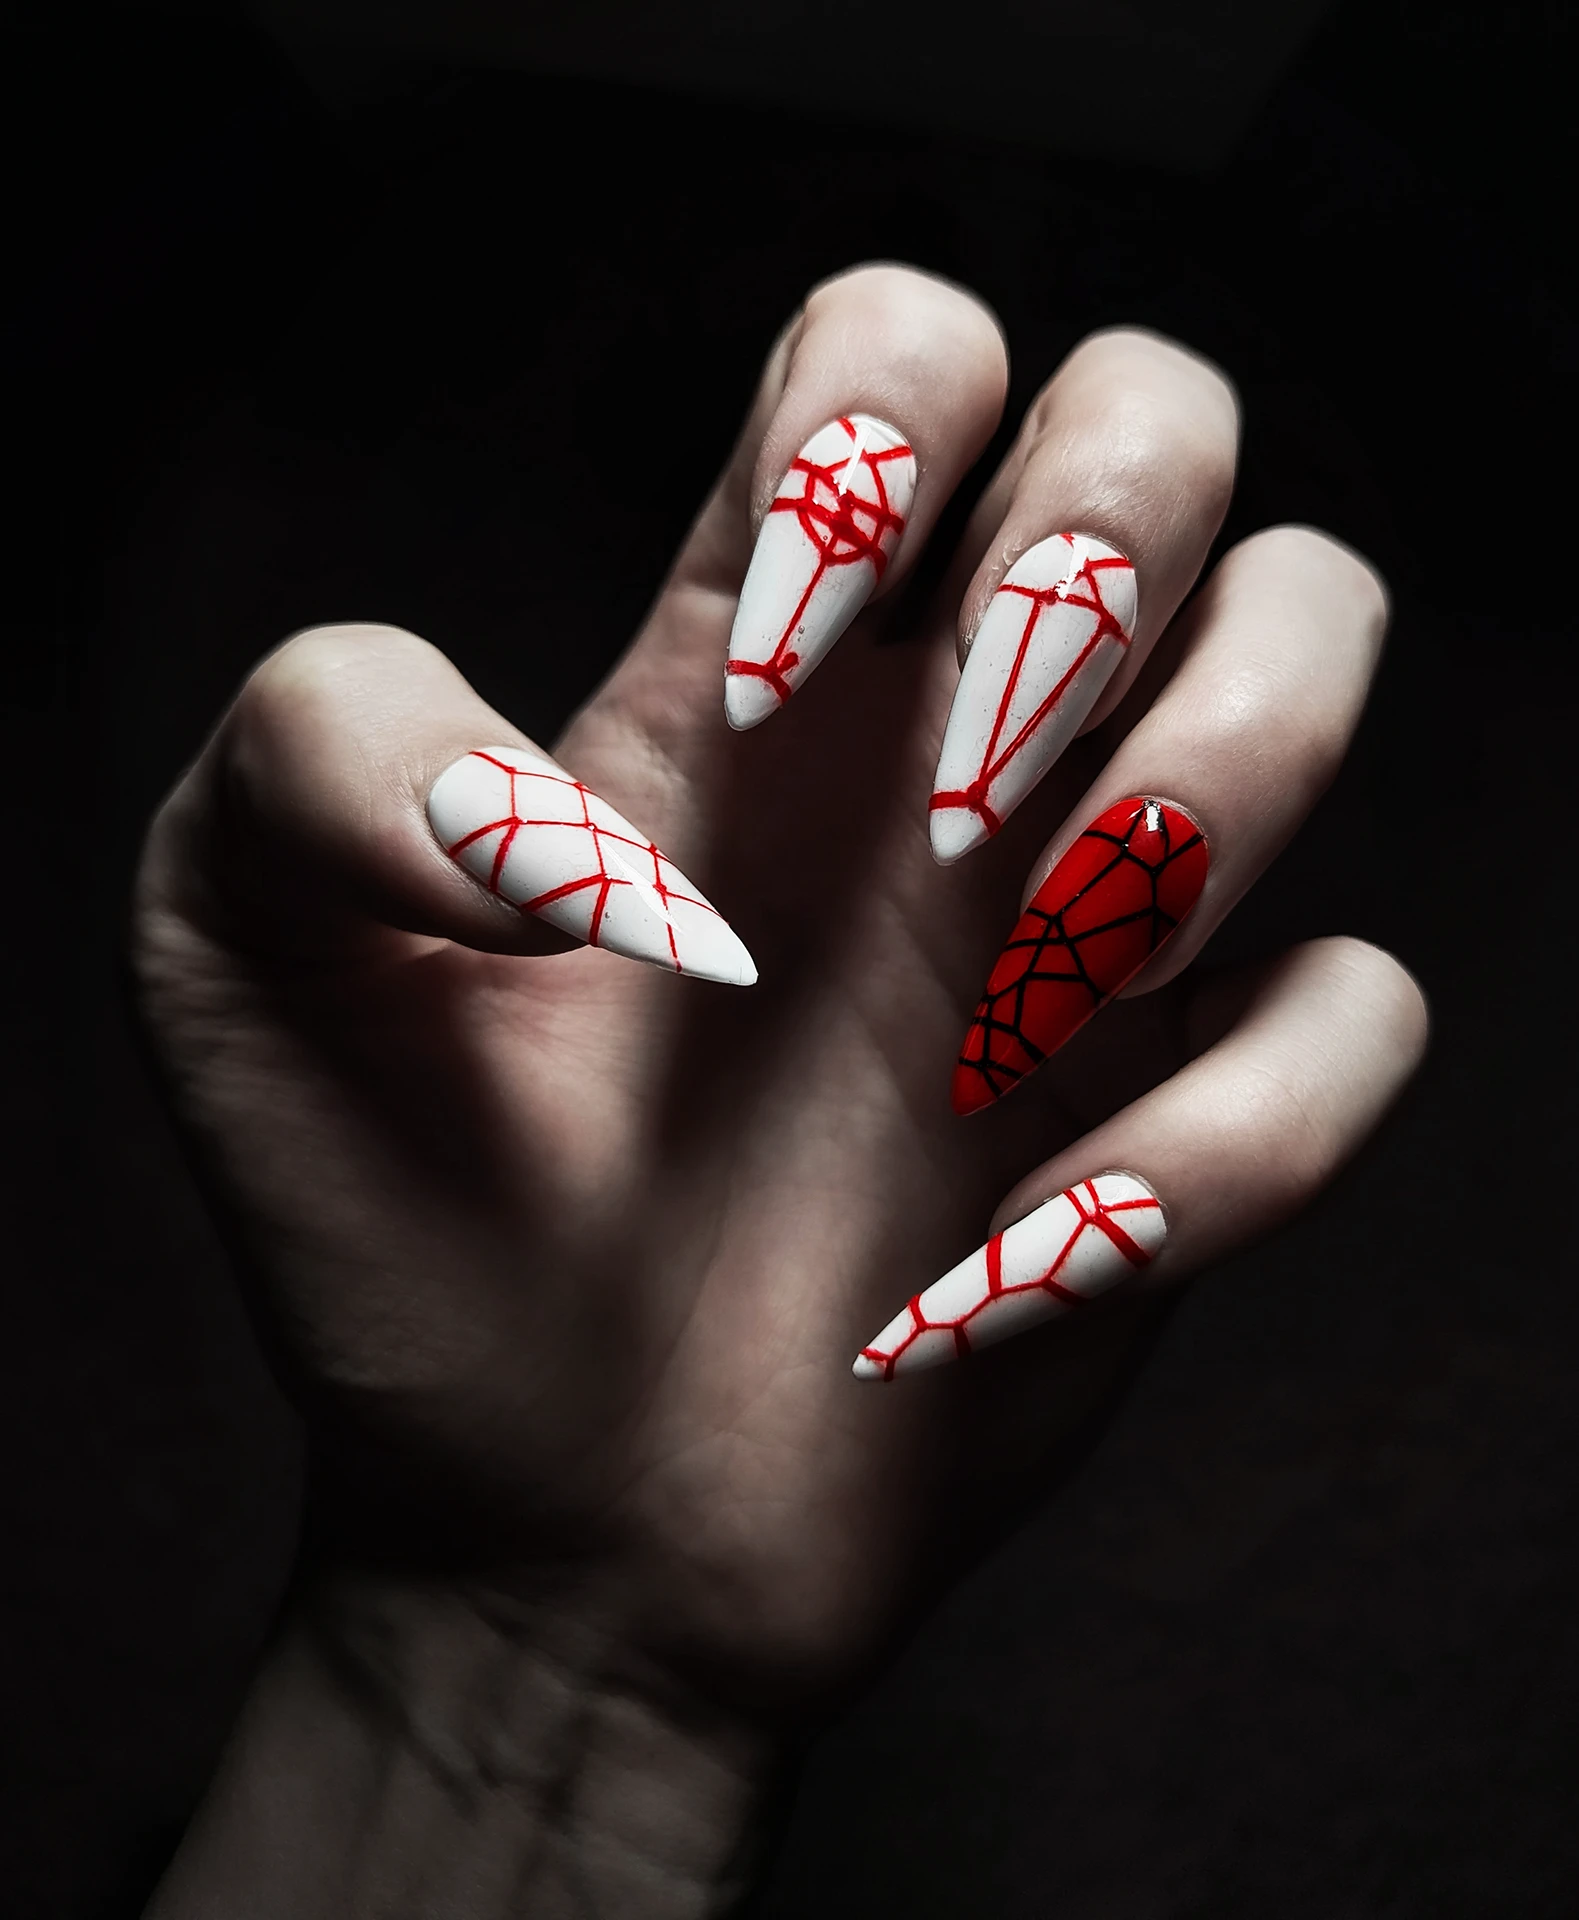
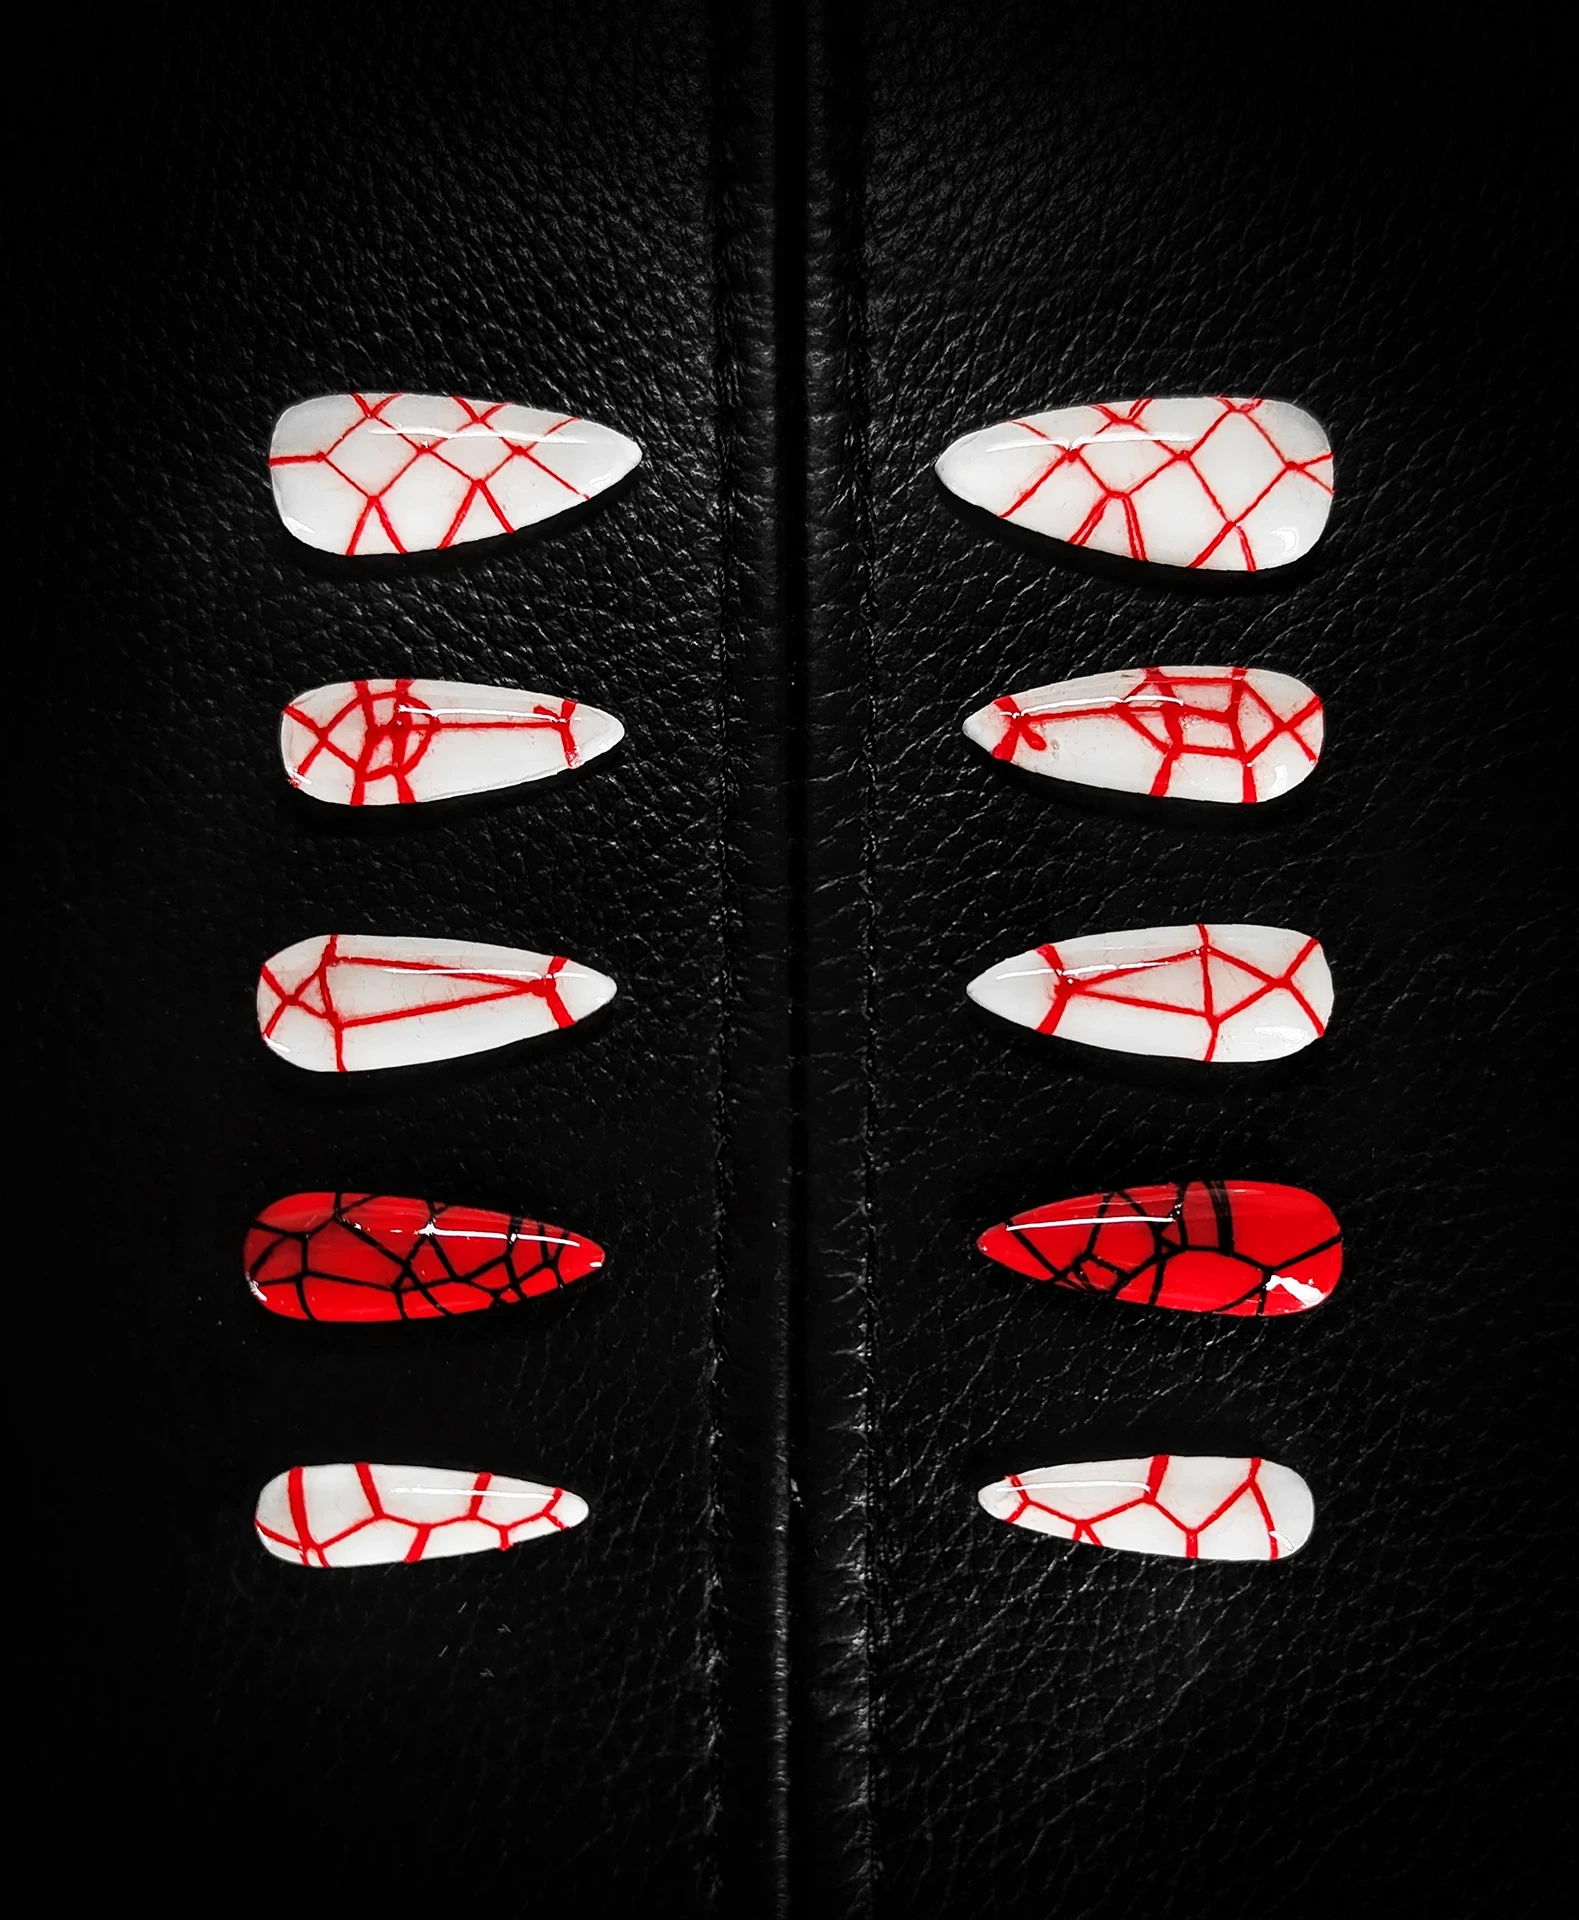
First I tested out various combinations of colors and especially different shades of red combined with white or black. I also tested white thread on black, but even though it looked great dry, the white became transparent when the clear coat was applied and it lost all contrast, which made the nail look significally less striking.
I settled on the brighter read for the maximum contrast and saturation, since it worked on top of a white background as well as itself as a background for black thread.
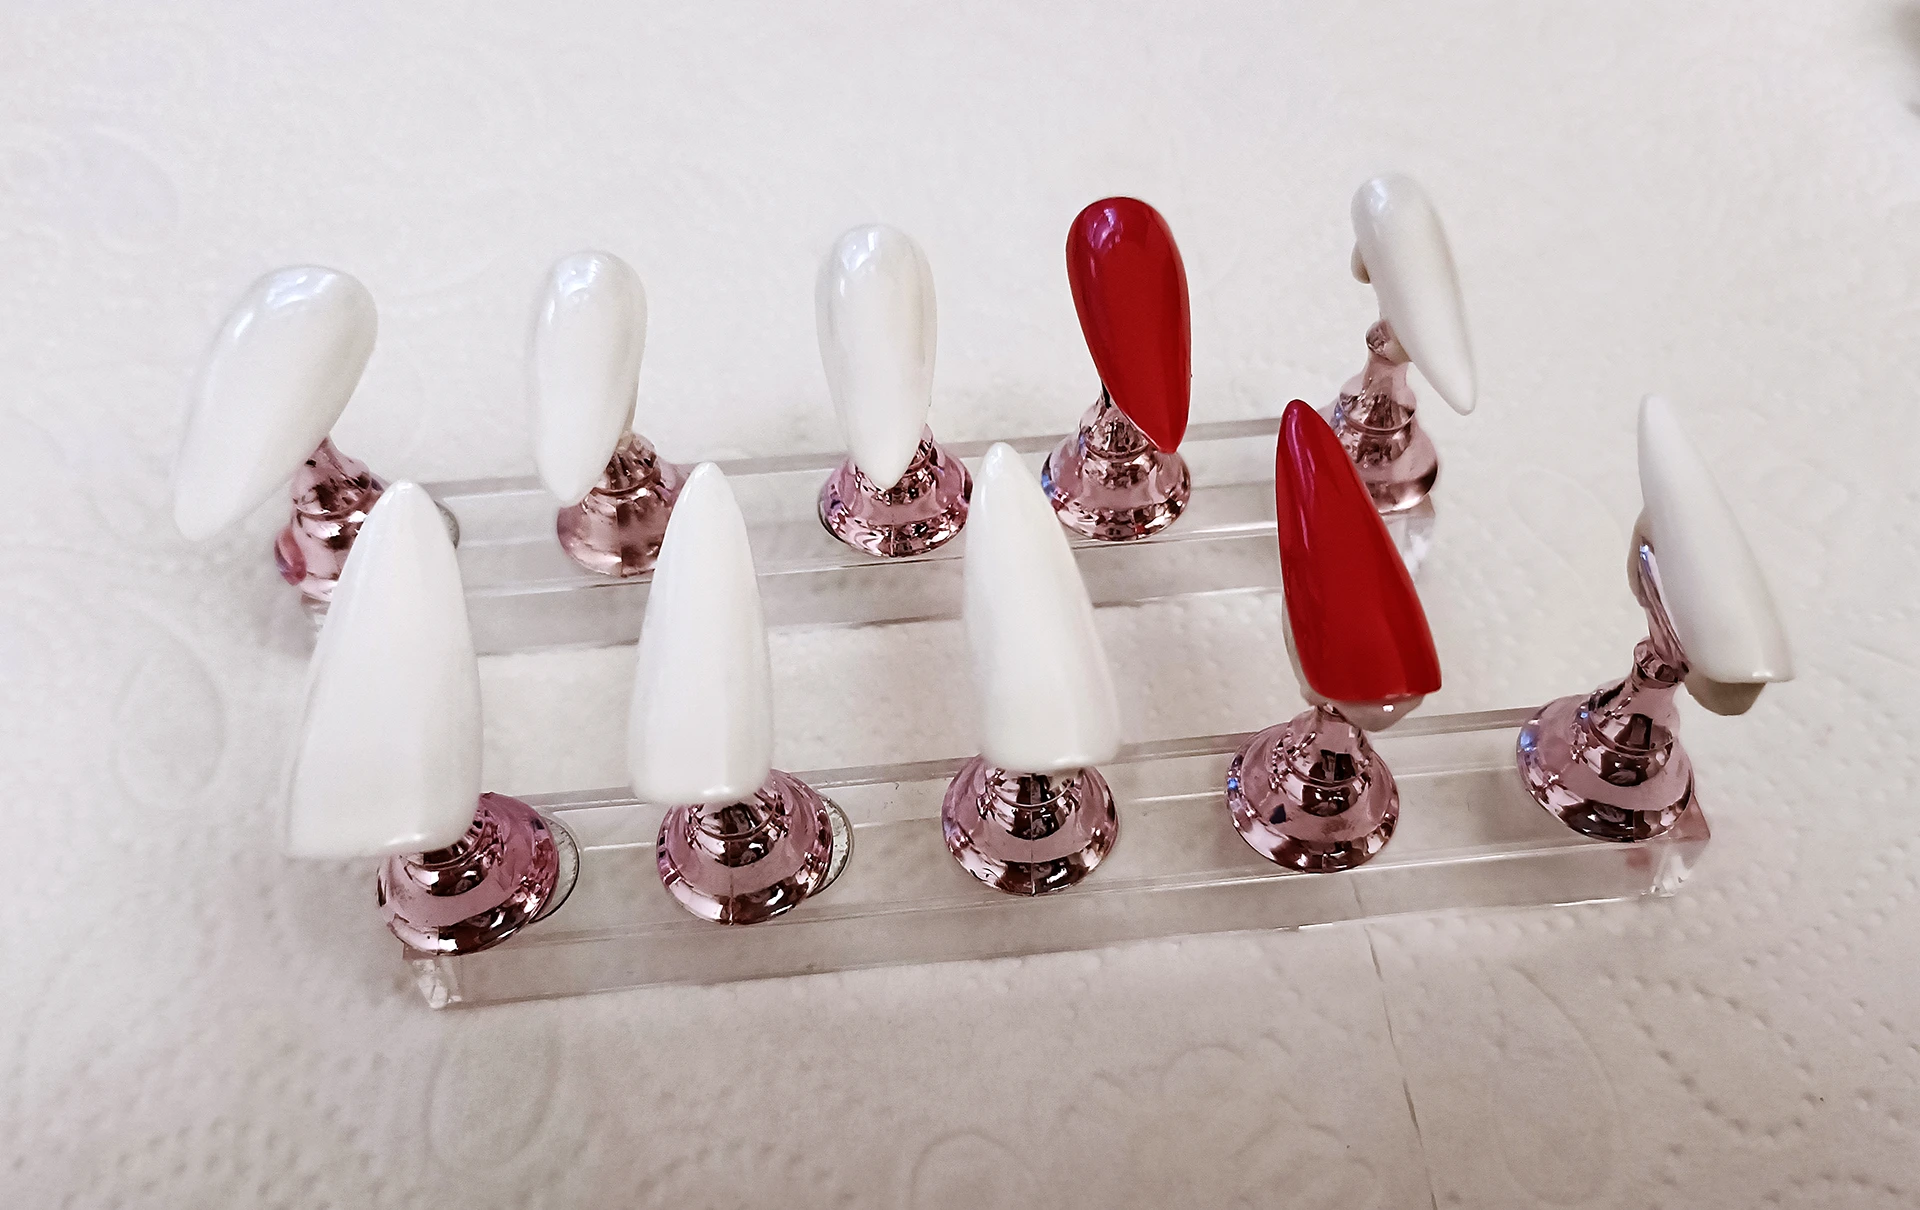
I often vary the design at the ring finger, since it has significance given it’s the finger wedding rings are worn, but it also stands out in a great way since it’s slightly off mid, but not too far towards the edge as the index often can be depending on the thumb position, so the ring finger contrasts well with its neighbors.
For this reason I chose to give the ringfinger a different desing in color and motif. I painted all nails white except for the striking red of the ring fingers.
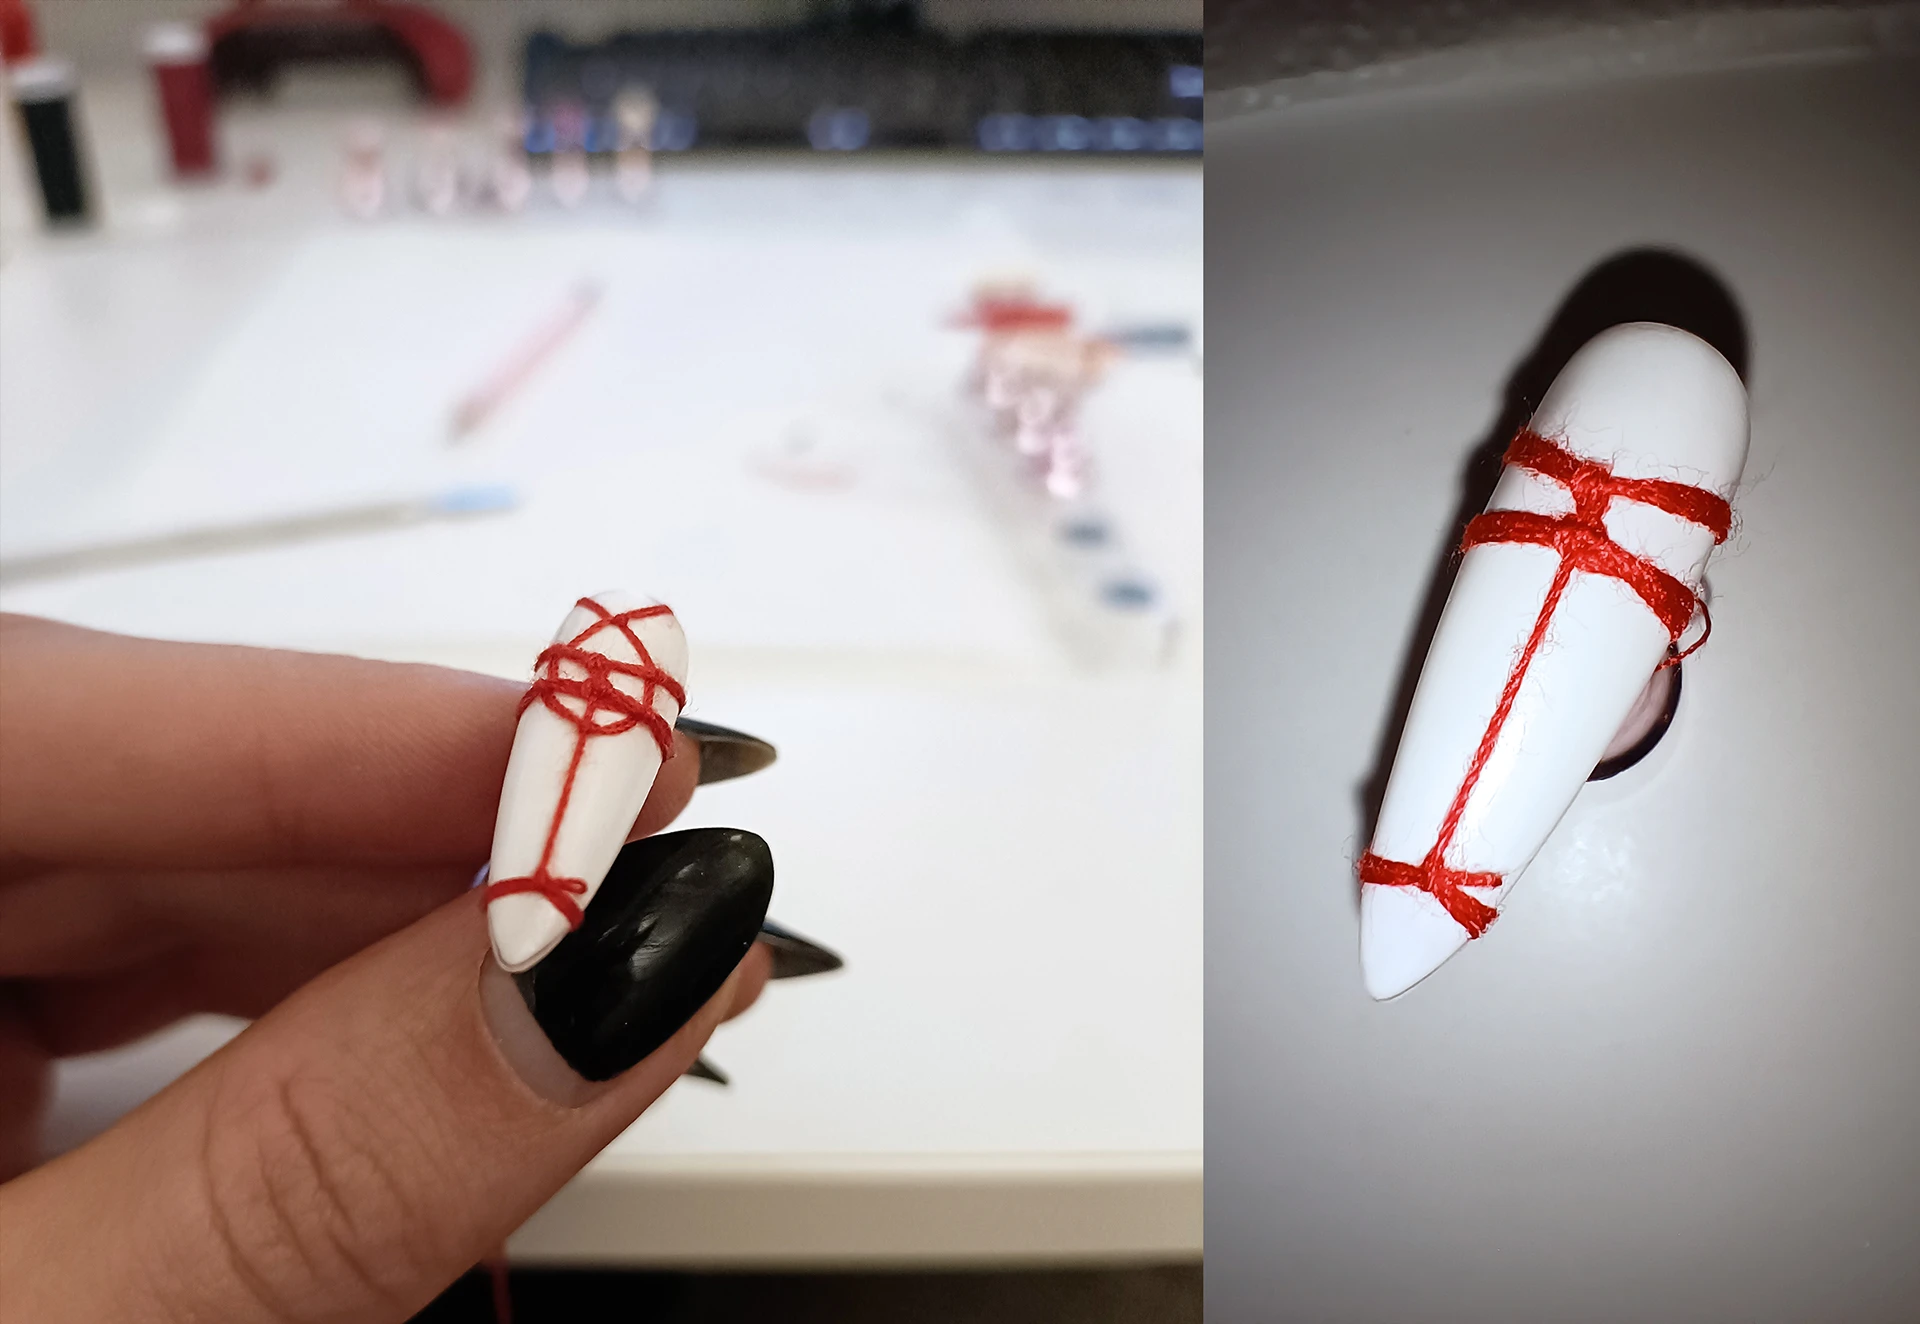
Finally for the Designs themselves, I wanted to incorporate actual ties, as well as more freeform ropework into the design. For actual ties, I used the Hishi Karada body harness for the thumbs, and the takate kote (or TK) box tie for the index fingers. You can see a version of the TK which you can see in the examples on top at the very left.
A detail I still love is that I left the single column ties around the tip of the index fingers intact, so it wraps around the whole nail and reveals its tied nature, since that would be almost impossible to do with just color.
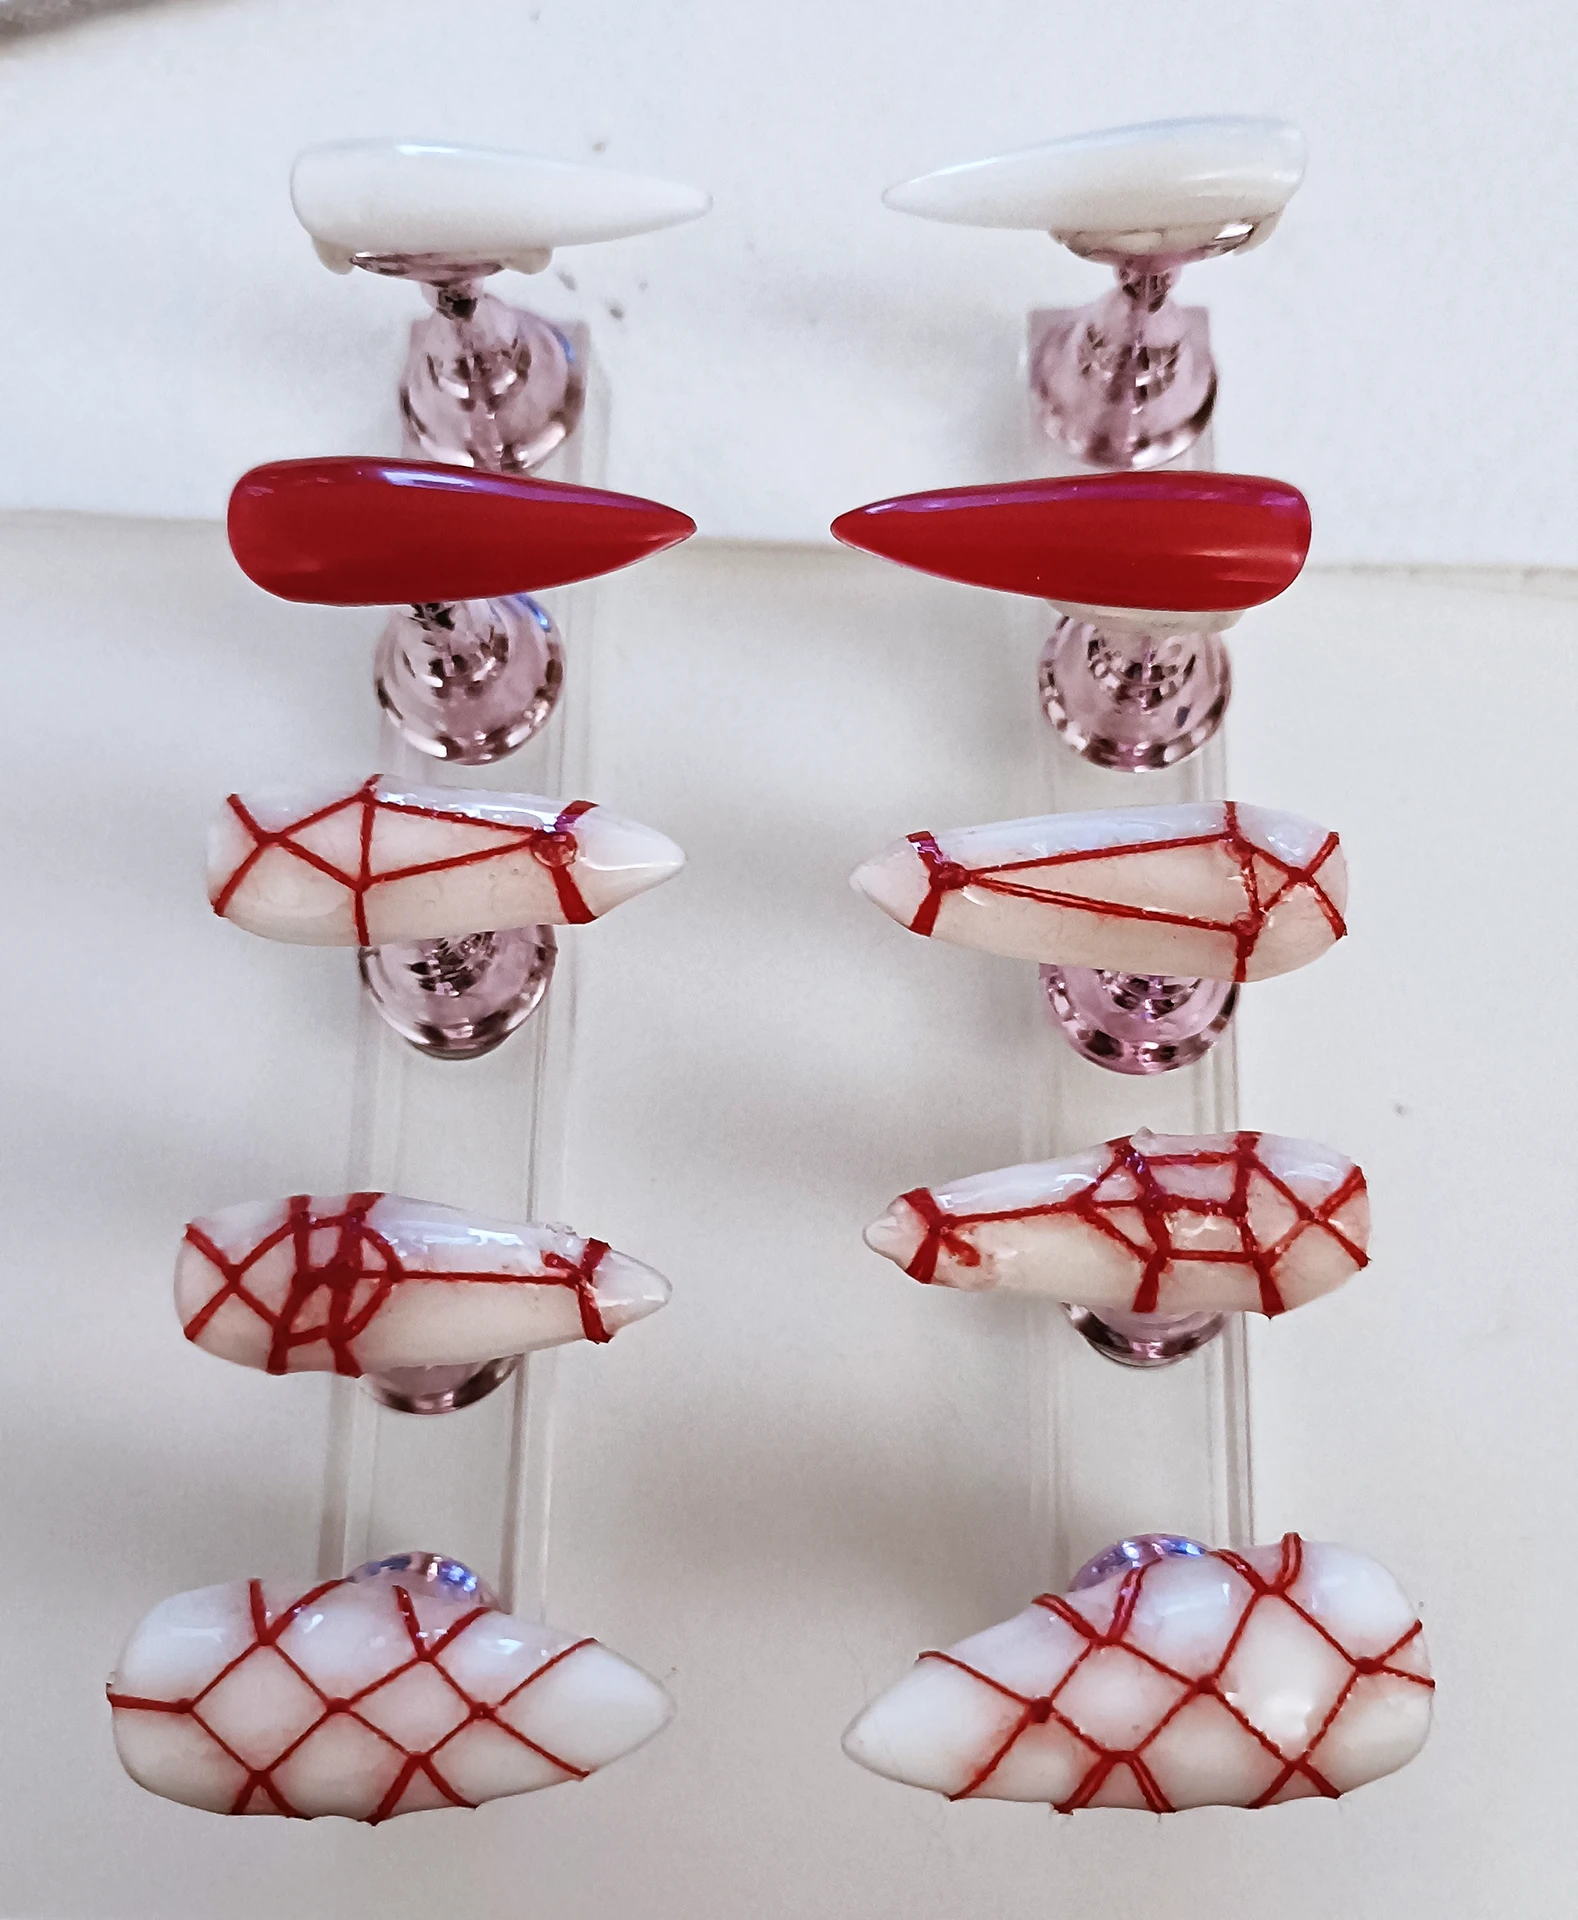
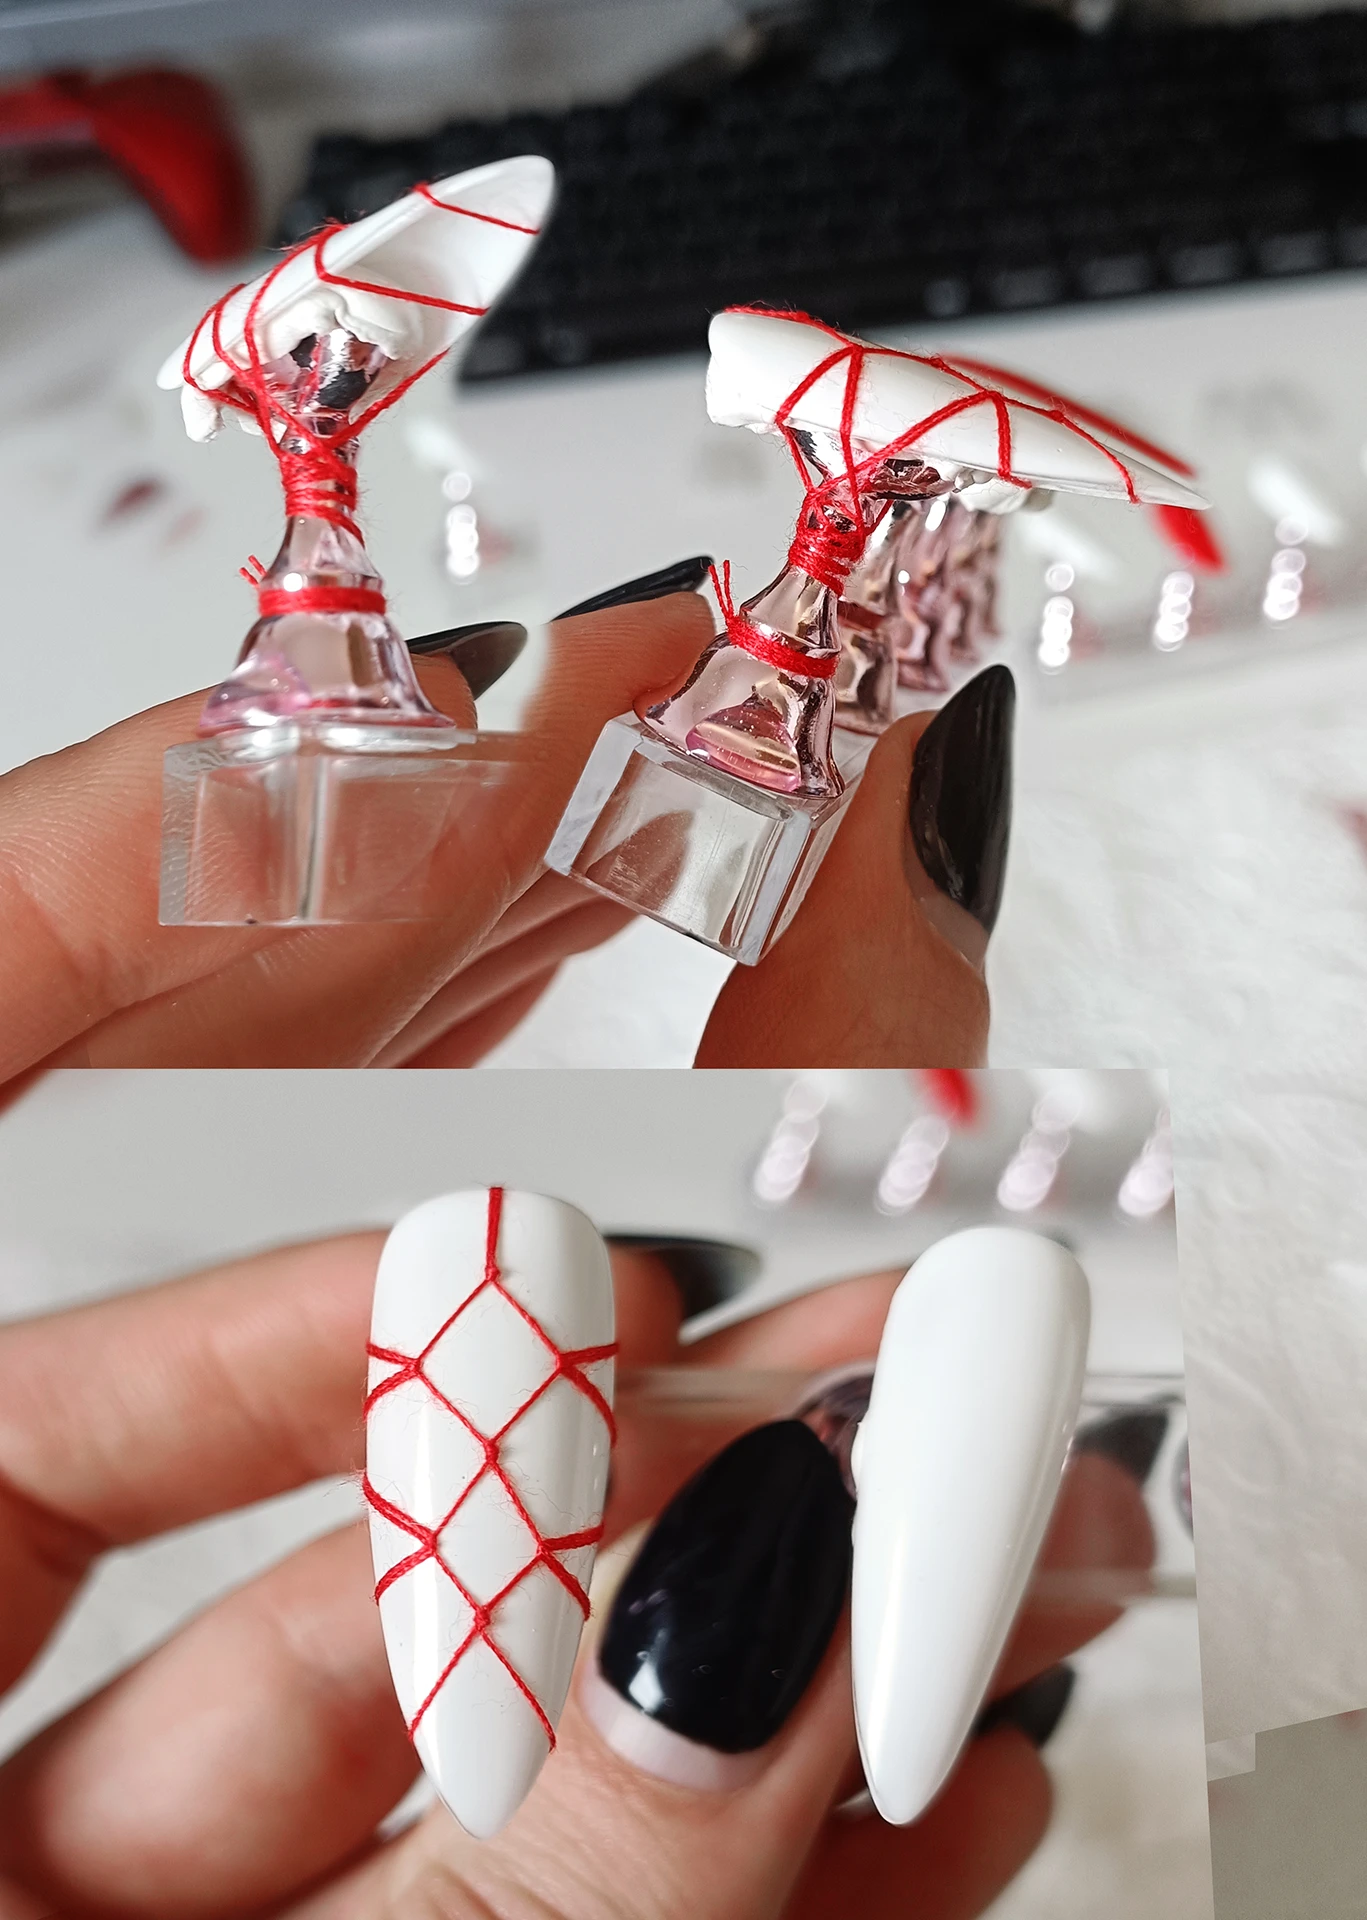
Besides those I wanted ties that emphasized the form of each, giving emphasizing the pinky with a long linear design, and with the middle finger I originally wanted the three loops to stick out and tie them together as another element revealing the nails nature, similar to the present single column tie in the Index fingers, it just turned out very ugly when it was encased, so I cut of the loop points and stuck with the prettier present triangular design.
Since I was aiming for something wild and different for the ring finger I wanted to incorporate that within the tie as well, with which I went very free form and leaned into the chaos that rope can create.